
- By myunclemike
- In crown molding
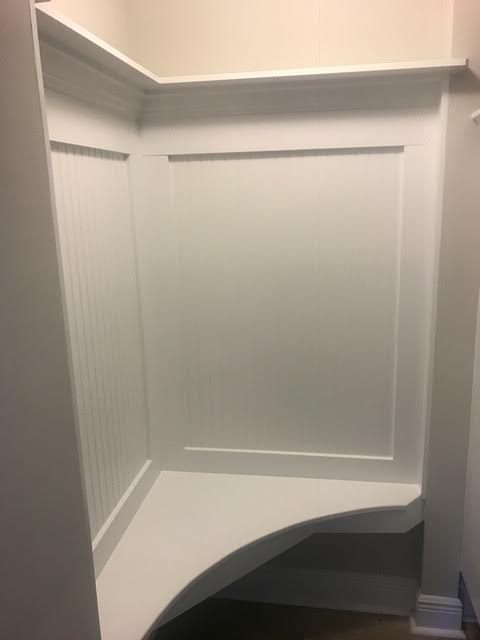
Crown Molding Installation Tips
Crown moldings are very useful in enhancing the interior of a room. There are mind boggling and cute designs that can change the appearance a room mystically. Most people install them at the edge of the wall where the moldings touch the ceiling. It is not difficult to install crown moldings. The test lies in cutting crown molding angles unequivocally, with the goal that they fit in the corner impeccably. The corner at the edge of the wall looks superbly square, at a 90-degree angle. However, if you measure with tools you will find that the walls are not generally even. Use these tips to make sure your crown molding project beautifully displays your distinctive style
Regardless of what type of crown molding you choose, crown molding installation makes the tone for the whole room. Crown molding installation draws the eye upward. It adds the dressing to a room much like adornments to an outfit. You’ll discover a few styles from which to settle on your decisions. Regardless of what your masterful stylistic layout, you’re certain to discover molding that will suit your style consummately. Crown Molding Installation is a do-it-without anyone’s help project, requiring pre-planning and in addition keen measurements, counts, and cutting. Follow after the below tips to make crown molding installation projects flow smoothly.
1. Choosing your design.Â
As you choose the design you’ll use for your crown molding installation project remember these certainties?
· Elaborate molding results smooth surfaces.
· Smooth molding results to textured surfaces.
· Keep your molding to proportion. Large moldings have a tendency to overpower a small space. For the average 8 ft. high ceiling the standard 3 to 4 inch molding ordinarily works best.
2. Choosing the Materials.
It is imperative to choose the right grade of materials relying upon whether you’ll be painting or staining your crown molding. The most widely recognized paint review materials include: pine, MDF (medium thickness fiberboard), and poplar. For many MDF has turned into the top choice. It’s available in an assortment of sizes and profiles. It is generally stable and opposes development and constriction bite the dust to temperature and stickiness changes. Paint review materials can be caulked to conceal minor defects at joints. Recolor review materials are for the most part produced using hardwood. Since caulking is impossible, this type of crown molding installation requires extremely exact cutting. Oak, mahogany, and fiery remains are normal decisions. Appropriate measurements and sawing are important for an expert looking completed project.
• Wood: Crown moldings of strong wood are well known. As a rule, oak wood or mahogany is utilized. In spite of the fact that they may be somewhat costly, they render an exemplary look to the room.
• PVC: The moldings of this material are impervious to dampness. These are incredible for sodden rooms or high-stickiness territories. But, you have to paint the moldings after installation since PVC tends to give an unfinished surface.
• Polystyrene: This is an affordable plastic. If you’re hesitant to spend much on sprucing up your room ceiling, this is a decent alternative for you. Like PVC, polystyrene gives an unfinished look, so you have to paint.
• Plaster: Ready to spend dollars? Go for plaster moldings. They come in complex designs, which give them a one of a kind look. The sheer creativity of these moldings dependably figures out how to blow your mind. If you have confidence in giving the best look to your home and wish to inspire your visitors, get plaster moldings. You can even get them custom made. They are somewhat expensive however.
• Polyurethane: If you’re looking for a durable and financially savvy choice, choose polyurethane crown molding. Its installation is simple, not at all like wood moldings. Furthermore, they are decay and creepy crawly safe. They guarantee to serve you for quite a while as a result of this quality.
3. Identify Imperfections.Â
Before you start the real installation of your crown molding, it is vital to identify high and low spots on the wall and ceiling. These spots can have a major effect in the genuine length and cut of the molding you require. More established home will have some droop in the ceiling or potentially a couple waves in the walls. One generally simple approach to manage these imperfections is to skim-coat the ceiling and walls with joint compound or plaster after the molding has been installed. In this example, you simply leave the holes and let the skim coat fill it.
4. Cutting the Crown Molding.Â
Precisely cutting your molding is the most difficult piece of crown molding installation. Aside from the exact measurements, another tip for precise cuts is to dependably monitor which edge is the top of the molding. Continuously attempt to envision how the molding will sit once it is nailed into place. Here a portion of the tips to cutting the correct angle
Tools
It is vital that you orchestrate the correct tools before the installation procedure starts. An adapting saw, and a miter saw will be extremely useful in cutting the shape angles. On the off chance that the form installation includes a gigantic venture, you may likewise need to put resources into a compound miter dance. This instrument will help you get the correct corners. It will be much less demanding for you to cut angles utilizing this gadget.
Practice
To get the ideal angle, it is a suggestion that you attempt on smaller pieces first. When you get a hang of it, you can cut whatever remains of the form pieces. Along these lines you won’t wind up squandering any molds. Such forms don’t come shabby, and it is imperative that you hit the nail on the head while cutting.
Measure
The most essential thing in cutting molding angles is taking the correct measurement. You should utilize tools for this. If your measurements are wrong, you will never get the exact angle. To be on the more secure side, I would encourage you to measure twice before you cut.
Markings
There are two bits of the shape. One is for the inside, and the other for outside. Therefore, you should check the molds with “I” or “O” to propose where they ought to be settled. This will guarantee that the crown angles splendidly touch the wall edges, and leave no spaces in the middle. It will spare you from settling the wrong piece at the wrong place.
Before you begin the way toward cutting crown molding angles, it would truly help if you see some video showings, or read about it. On the Internet itself, you will discover a ton of data on this. Experiencing them will manage you during the time spent crown form installation.
Ready to get started? Contact Mike today here


4 COMMENTS
Alice Carroll
April 2, 2020, 10:00 pm REPLYThanks for the tip that pine is a good material for crown moldings because of its medium thickness. I’ve always wanted crown molding in my living room because I think it will instantly impress visitors, especially some of my friends who are interior design buffs like me. I hope I find a shade that will complement my beige walls.
Tyler Johnson
February 25, 2021, 5:43 pm REPLYThat makes sense that measuring would be super important for having crown moldings installed. I have been historically pretty bad at taking measurements, so it might be nice to have some help. I should consider getting a professional plasterer to help me out of I decide to install some crown moldings.
Tez
March 18, 2021, 2:40 am REPLYI like your ceiling tips. I need crown molding installed. I’ll have to call a contractor.
site
October 25, 2021, 1:55 am REPLYThank you for sharing this post. It was very informative!